Azure Identity Protection is an Azure AD Premium P2 feature (with a few limited features available in P1) that allows organizations to identify several types of risks in the Azure AD environment based on signals received and processed, including the following:
- Impossible or atypical travel (logging in from two geographically distant areas in a very short amount of time)
- Usage of anonymous IP address ranges
- Usage of malware-linked IP addresses
- Leaked credentials, such as end user or workload identity client IDs or secret values
- Password spray attempts
These risks are categorized into three tiers: low, medium, and high. While Microsoft doesn’t provide exact details on what signals or combinations of signals are used as the basis of categorization, it does provide reporting and workflows that can mitigate the risks.
When these types of activities or events are detected, notifications are generated for administrators. For example, users attempting to log in when impossible travel is detected may be presented with a dialog to re-confirm their identity using an already established multi-factor authentication method.
Depending on how your security organization is structured, you may be able to delegate certain levels of responsibility. The following table describes the roles and types of access available to Identity Protection users:
Role | Actions Allowed | Actions Prohibited |
Global Administrator | All | |
Security Administrator | All | Reset user passwords |
Security Operator | View all Identity Protection reports Dismiss user risk, confirm safe sign-in, confirm compromise | Configure policies Reset user passwords Configure alerts |
Security Reader | View all Identity Protection reports | Configure policies Reset user passwords Configure alerts Give feedback on detections |
Global Reader | Read-only access to Identity Protection | |
Conditional Access Administrator | Create Conditional Access policies that use risk as a sign-in condition | All Identity Protection actions |
Table 8.1 – Identity Protection roles
Identity Protection data is contained in four reports:
- Risky users
- Risky workload identities
- Risky sign-ins
- Risk detections
Figure 8.26 shows examples of risk items:
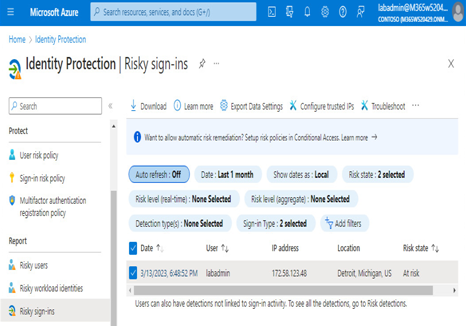
Figure 8.26 – Identity protection reports
Using the data in these reports, you can review details of risk events in the tenant.
Planning for Identity Protection
Azure AD Identity Protection detects identity-based risks in your organization and reports and allows administrators to perform remediations. Before implementing Identity Protection policies, you should review the existing reports.
Investigating risks
You can review risks by reviewing the various risk detection reports on the Identity Protection blade (https://aka.ms/identityprotection). For example, you can expand the Risky users report and select an individual user, as shown in Figure 8.27:
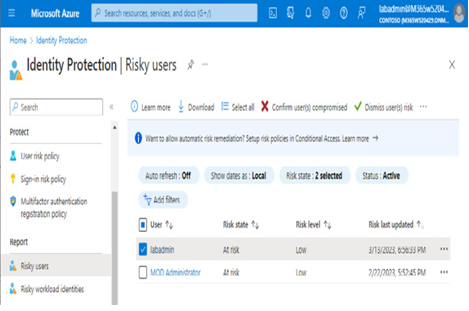
Figure 8.27 – Risky users report
By clicking on the user, you can view details regarding the items contributing to the risk level for the user, as well as historical data for risk-related events. You can perform additional actions for a user, such as confirming that a user has been compromised, dismissing risk, blocking the user from login, or opening the corresponding events in Microsoft 365 Defender:
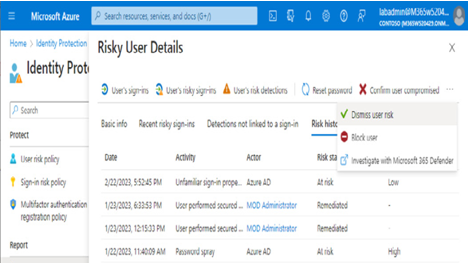
Figure 8.28 – The Risky User Details pane
The Risk info area of the Risky Sign-in Details page allows you to further understand the types of risks associated with the user, as shown in Figure 8.29:
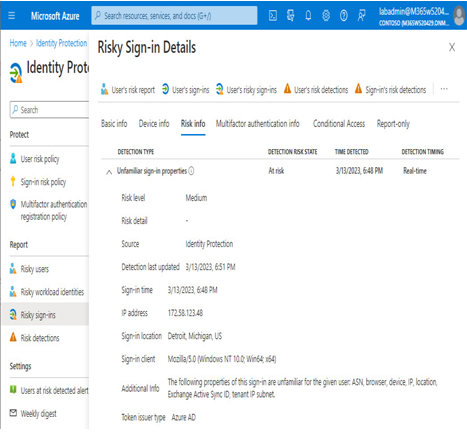
Figure 8.29 – The Risky Sign-in Details page
After reviewing risky sign-in data and confirming safe or compromised logins, you can move on to remediating risks.